")
How to Remove an Instrument Cluster Easily and Safely
Nunc dictum nisl a
Removing your instrument cluster isn’t as hard as it sounds. With a few tools and the right prep, you can do it at home. Start by disconnecting the battery, then remove the trim and screws that hold the cluster in place.
Pull it out gently, disconnect the wires, and your cluster is free. Sounds simple, but each step matters. Whether you’re fixing dim lights or upgrading to LEDs, this guide walks you through it all.
Digitech Auto Solutions has helped countless GM owners restore their clusters with care and precision. Keep reading to learn how to remove yours safely and get it ready for repair or upgrade.
Understanding Instrument Clusters
Before removing an instrument cluster, know what it is, why you might need to take it out, and how to stay safe. This helps you avoid damage and handle the process with care.
What Is an Instrument Cluster?
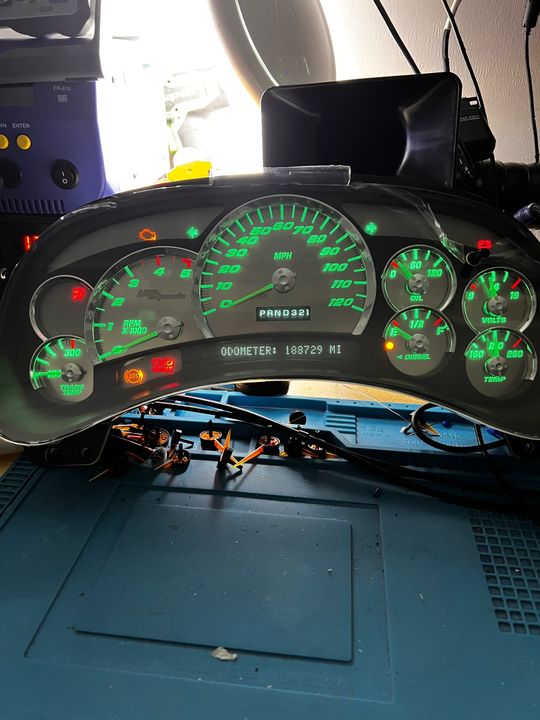
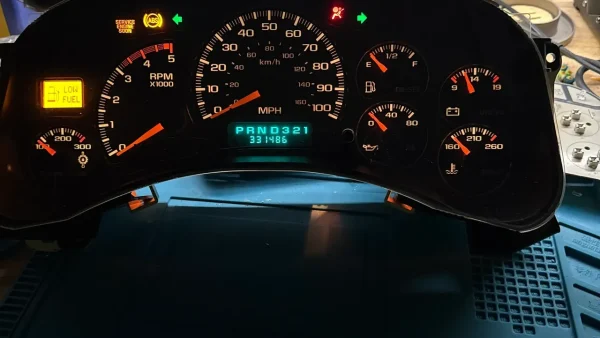
An instrument cluster is the set of gauges and lights on your dashboard that shows important information about your vehicle. It includes your speedometer, fuel gauge, temperature gauge, and warning lights like the check engine light.
This panel helps you monitor your car’s condition while you drive. Many modern clusters are digital or have LED displays, making them more complex but easier to read.
If your cluster isn’t working right, fixing or replacing it is essential.
Common Reasons for Removal
You might need to remove the instrument cluster for several reasons:
- Faulty gauges: Speedometer or fuel gauge not working properly
- Dim or dead displays: Lights or screens that don’t light up
- Warning lights stuck on or off: False alerts
- Upgrades: Installing custom LED lighting or chrome lenses
- Electrical issues: Battery drains linked to the cluster wiring
Removing the cluster lets you check for broken parts, clean connections, or install upgrades. Many problems come from sensors or wiring, so cluster removal is a key first step.
Safety Precautions
Always disconnect your vehicle’s battery before starting. This prevents electrical shock or damage to your car’s electronics.
Handle the cluster gently. The components inside are delicate and can break if you force or drop them. Use the right tools and avoid touching circuit boards or connectors with bare hands.
Work in a clean, dry area away from static electricity. Ground yourself or use anti-static gear if possible to protect sensitive electronics.
If you don’t feel confident, a professional can help. They use OEM equipment and have the skills to keep your cluster safe during repair or upgrades.
Tools and Materials Needed
To remove an instrument cluster safely, use the right tools to avoid damaging the dashboard or electrical parts. Some supplies help protect surfaces and keep small pieces organized. Having everything ready makes the job smoother and faster.
Essential Tools List
You need a few screwdrivers, including Phillips and flathead, to remove the cluster screws. A plastic trim removal tool helps pry off panels without scratching your dash.
A ratchet with the correct socket size, usually 7mm or 8mm, works for bolts securing the cluster frame. Use needle-nose pliers to disconnect wiring harnesses carefully.
Keep a flashlight handy to see behind the cluster, especially in low light. Always disconnect your car battery before starting.
Recommended Supplies
A magnetic parts tray or small container keeps screws and bolts safe during the job. Painter’s tape helps label wiring connectors or hold parts temporarily.
Use a soft cloth or microfiber towel to protect the dashboard surface. If your dash pieces snap together, use extra plastic pry tools to avoid breaks.
Take pictures with a digital camera or phone during disassembly. This helps you reassemble everything correctly later.
Step-By-Step Guide to Removing an Instrument Cluster
Removing your instrument cluster needs careful prep, electrical attention, and proper technique to prevent damage. Complete each step methodically to keep your vehicle safe and make the process smooth.
Preparing the Vehicle
Disconnect your vehicle’s battery first. Use a wrench to loosen the negative battery terminal and remove the cable.
Move the steering wheel down or adjust it to create more working space. Some vehicles may require you to remove plastic trim panels or the bezel surrounding the dashboard. Keep all screws and clips in a labeled container.
Work in a clean, well-lit area. Wear gloves to avoid fingerprints or damage on delicate surfaces and to protect your hands from sharp edges.
Accessing the Instrument Cluster
Gently remove the trim around the cluster. Screws or clips usually hold it in place. Use a plastic trim removal tool to avoid scratching your dashboard.
Locate and remove the screws holding the cluster. These are usually Phillips or Torx screws. Pull the cluster forward just enough to access the connectors at the back.
If the cluster feels stuck, check for hidden screws or clips.
Disconnecting Electrical Connections
Behind the cluster, you’ll see electrical connectors. Before unplugging, take a picture or label the connectors.
Most connectors have a tab or clip to press or pull for release. Be gentle to avoid breaking pins or plastic housings. Wiggle the connectors slightly if they’re tight, but never use excessive force.
Unplug multiple connectors one at a time, keeping track of their positions. Check wiring for visible damage before removing the cluster completely.
Safely Removing the Cluster
With all screws removed and connectors unplugged, carefully pull the cluster out of the dashboard.
Place the cluster on a soft, clean surface to prevent scratches or damage. Avoid touching the circuit board or display screen directly.
Shipping Your Cluster for Professional Repair
When removing the instrument cluster for service, handling and packaging are as important as removal. After disconnecting the wiring, place the cluster in a clean, anti-static bag if available. Wrap it with bubble wrap and use a sturdy box that fits snugly.
Make sure the box is labeled “FRAGILE – ELECTRONICS” to avoid damage in transit. Include your name, contact info, and any notes about the cluster issues to help the repair team address the problem quickly.
This small step ensures your cluster arrives safely and helps you avoid delays or costly replacements. It’s a smart move if you’re planning upgrades or repairs that need professional attention.
Troubleshooting and Tips
Removing your instrument cluster can get tricky if parts don’t move as expected or if clips and screws break. Knowing how to handle these issues helps you avoid damage.
Dealing With Stuck Components
If parts of your cluster feel stuck, don’t force them. Double-check that all screws and bolts are removed. Some screws may be hidden behind trim pieces or labels.
Use a plastic pry tool to gently loosen edges without scratching surfaces. Apply a bit of penetrating oil on stubborn screws or clips and let it sit for a few minutes before trying again.
If the cluster frame resists, wiggle it gently rather than pulling straight out. This reduces the risk of bending or breaking. Keep track of all parts to avoid missing any small fasteners later.
Handling Broken Clips or Screws
Broken clips or stripped screws are common problems during cluster removal. If a clip breaks, replace it instead of forcing the cluster back into place.
For stripped screws, try these options:
- Use a rubber band between your screwdriver and the screw for extra grip.
- Switch to a screwdriver with a different head size or style.
- Remove stripped screws with an extractor tool if needed.
If screws are stuck deep or damaged, and you don’t have the right tools, consider professional help. Proper repair prevents costly damage to your dashboard or cluster.
Reinstallation and Final Checks
After removing or repairing your instrument cluster, reinstall it carefully and make sure everything works correctly. Reconnect all wiring and test the cluster’s functions before finishing up. This helps avoid problems once you’re back on the road.
Reconnecting the Instrument Cluster
Align the instrument cluster with the dashboard mounting points. Make sure all connector plugs fit snugly into their sockets without forcing them. Each connector usually clicks in place when fully seated.
Double-check the wiring for visible damage or loose pins. Damaged wires can cause malfunctions or intermittent issues later.
Once the connectors are attached, fasten the screws or clips holding the cluster in place. Avoid overtightening screws to prevent damage to the plastic housing.
Reconnect your vehicle’s battery to restore power to the cluster and dashboard electronics.
Testing Functionality
After restoring power, turn your ignition to the “on” position without starting the engine. Watch the cluster for the usual self-check routine, like gauges moving briefly or lights flashing.
Check each gauge: speedometer, tachometer, fuel, temperature, and any digital readouts. Make sure the needles move smoothly and return to zero when off.
Test warning lights like check engine, ABS, and oil pressure. They should illuminate briefly and then turn off unless there’s an issue.
If your cluster has backlighting, check brightness and color consistency. Dim or flickering lights may indicate a poor connection or bulb issue.
If you notice anything unusual, don’t drive yet. Fix the problem now for safety. A professional diagnosis can help if needed.
Handle Cluster Removal With Confidence
Removing your instrument cluster doesn’t have to be complicated. With the right tools, patience, and safe steps, you can handle the job at home.
From disconnecting the battery to testing the reinstalled cluster, following each step helps avoid errors or damage. If your gauges are flickering or stuck, don’t wait.
Digitech Auto Solutions can diagnose and repair your GM cluster with precision. Whether you’re upgrading your dash or fixing a fault, we ensure your cluster is fully tested and works like new.
Frequently Asked Questions
Removing an instrument cluster requires the right tools, careful handling of electrical connections, and following safety steps like disconnecting the battery first.
Knowing how to safely access the dash and properly reconnect everything after service ensures your vehicle works well.
What tools are needed to take out the instrument cluster from a Chevy Silverado?
You will need a flathead screwdriver, a Phillips screwdriver, and a socket wrench set. Some models may also require trim removal tools to avoid damaging the plastic dash panels.
Can you guide me through the process of removing an instrument cluster from a Ford Focus?
Start by disconnecting the battery. Then, carefully pry off the trim around the cluster. Remove screws holding the cluster in place, slide it forward, and disconnect the wiring harness behind it.
Are there any specific precautions to take when detaching an instrument cluster?
Always disconnect the battery first to avoid electrical shorts or airbags accidentally deploying. Be gentle with connectors and do not force parts, as dash components can break easily.
How can I disconnect the battery before working on the instrument cluster?
Open the hood and use a wrench to loosen the negative terminal clamp on the battery. Remove the clamp and secure it away from the battery to prevent accidental contact.
What is the step-by-step method for safely removing the dash to access the instrument cluster?
Remove surrounding trim pieces with trim tools or screwdrivers. Unscrew fasteners holding the dash or cluster bezel. Gently pull the dash section forward to get access. Avoid pulling on wires or connectors attached to the dash.
How do I ensure all connections are properly reconnected after replacing or servicing my instrument cluster?
Make sure all wiring plugs are securely in place. Reattach any screws or brackets that hold the cluster. Connect the battery last, then test all gauges and lights before finishing reassembly.
t vehicula accumsan. Nam fringilla tellus sed ipsum porttitor pellentesque. Sed ornare nunc quis mauris vulputate sodales. Nullam sollicitudin lectus dolor, nec mollis augue iaculis ac. Ut massa tortor, facilisis nec blandit eu, efficitur non mauris. Morbi imperdiet eleifend felis at placerat. Praesent aliquet fringilla mattis.
Aenean tristique commodo gravida. Donec vitae commodo mauris, id pharetra dui. Integer tempor nunc sit amet tellus accumsan lobortis. Vivamus tempor, ex id dignissim sodales, neque est molestie quam, non maximus orci arcu sit amet turpis. Etiam quam turpis, scelerisque commodo erat nec, luctus maximus nulla. Quisque suscipit tellus eu nisl tempor tempus. Aliquam erat volutpat. Nunc ut ex quis metus viverra rhoncus porttitor sit amet sem. Sed condimentum euismod cursus.


Leave a comment